If you love the convenience of your Keurig coffee maker but have noticed your coffee doesn’t taste as fresh as it used to, it’s time for a deep clean. You might not realize it, but your machine collects mineral buildup, coffee oils, and residue that can affect both flavor and performance.
Cleaning your Keurig regularly not only keeps your coffee tasting great but also extends the life of your machine. In this guide, you’ll discover simple, step-by-step methods to clean and descale your Keurig, using items you likely already have at home.
Ready to bring back that perfect cup of coffee every time? Let’s get started!

What You’ll Need Before Cleaning Your Keurig
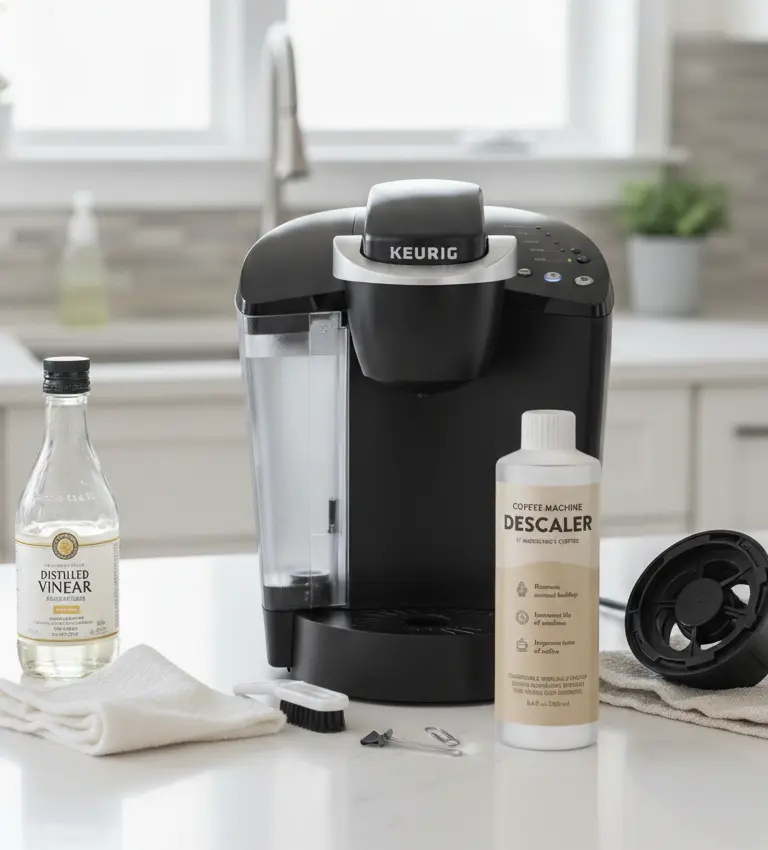
Before you start cleaning your Keurig coffee maker, gather a few simple items. Having everything ready makes the process faster and easier.
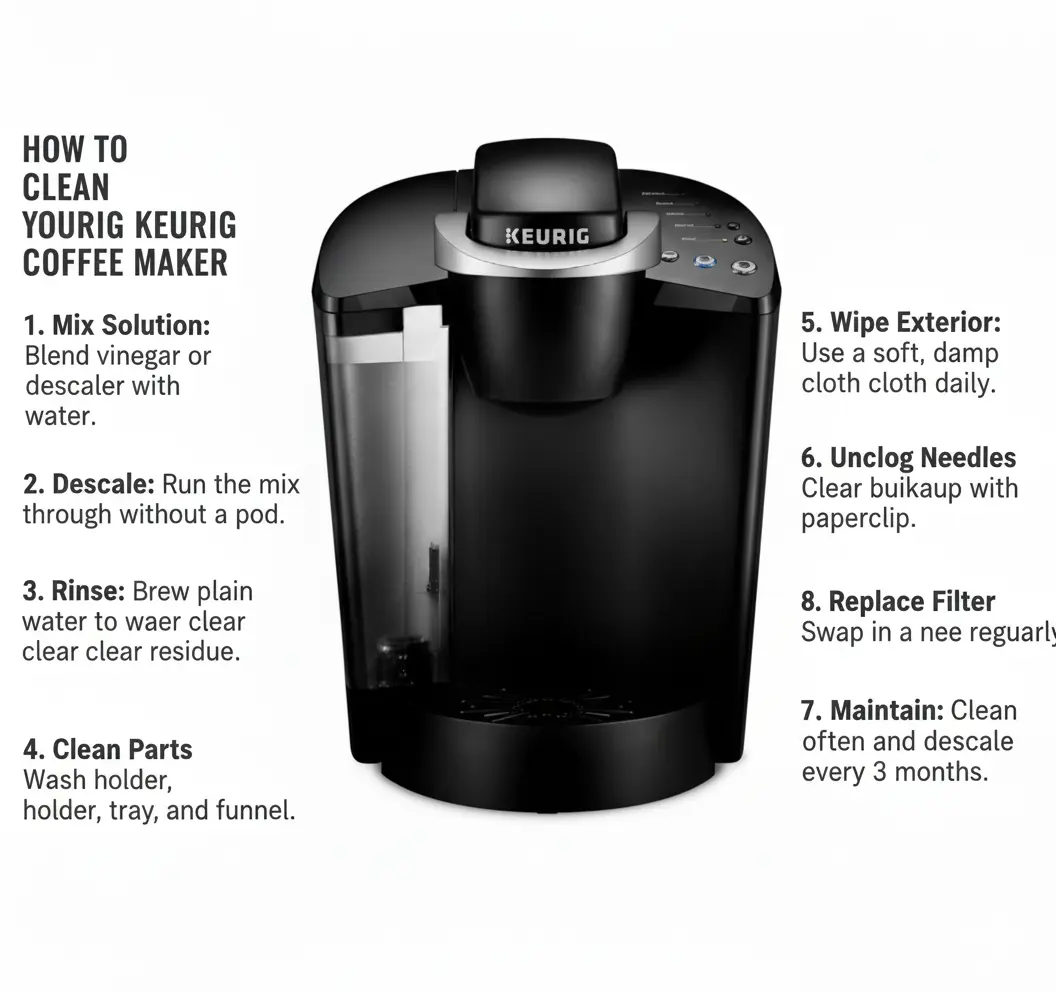
White Vinegar or Descaling Solution – Helps remove mineral buildup and coffee residue.
Fresh Water – Used for rinsing and flushing out the machine after descaling.
Mild Dish Soap – Safe for cleaning removable parts like the drip tray and K-Cup holder.
Soft Cloth or Sponge – Gently wipes the exterior without scratching the finish.
Paperclip or Cleaning Tool – Helps clear coffee grounds from the entrance and exit needles.
New Water Filter (Optional) – Replace it if it’s due for a change to keep water fresh.
Tip from experience: I like to set everything on the counter before I begin. It saves time and keeps the cleaning process smooth from start to finish.
Step 1: Prepare the Cleaning Solution for Your Keurig Coffee Maker
Preparing the cleaning solution is a key step in maintaining your Keurig coffee maker. This process removes mineral buildup and keeps your machine brewing fresh coffee. Choosing the right solution ensures effective descaling without damaging the machine. Two common options include a vinegar and water mix or a commercial descaling product. Each has its benefits and simple preparation methods.
How to Clean Keurig Coffee Maker with Vinegar and Water
White vinegar works well to break down mineral deposits inside your Keurig. Start by filling the water reservoir halfway with white vinegar. Then, add fresh water until the reservoir reaches the maximum fill line. This mix is strong enough to clean, yet safe for your machine.
Use this solution for the descaling cycle by running the brew process without a K-cup. The vinegar mixture will flow through the internal parts, dissolving scale and buildup. After the cycle, rinse the reservoir thoroughly and run multiple fresh water cycles to remove any vinegar taste.
Choosing Commercial Descaling Solutions
Commercial descaling solutions are specially made for coffee makers. They often work faster and leave no strong odors or tastes. These products come with clear instructions on how to mix and use them safely.
To prepare, pour the recommended amount into the water reservoir. Add water if the product requires dilution. Run the brewing cycle without a K-cup, just like with vinegar. After descaling, rinse the machine by running several fresh water cycles to clear out any residue.

Credit: www.goodhousekeeping.com
Step 2: How to Descale a Keurig Coffee Maker
Descaling the Keurig coffee maker removes mineral buildup inside the machine. This buildup affects taste and performance. Regular descaling keeps your coffee fresh and the machine working well. Use a mix of vinegar and water or a store-bought descaling solution. Follow these simple steps to descale effectively.
Filling The Reservoir
Start by emptying the water reservoir. Fill it halfway with white vinegar. Add fresh water up to the max fill line. This mix helps dissolve mineral deposits inside the machine. Make sure the reservoir sits properly in place.
Run a Cleaning Cycle Without a K-Cup Pod
Place a large mug on the drip tray. Do not use a K-cup. Run a brew cycle to let the vinegar solution flow through. Repeat this until the reservoir is almost empty. This process cleans the internal tubes and heating element.
Repeat the Descaling Process to Remove All Buildup
Refill the reservoir with fresh water only. Run several brew cycles without a K-cup. This rinses out any vinegar left inside. Repeat the rinse if you still smell vinegar. Your machine is clean once the smell is gone.
Step 3: Rinse Your Keurig Coffee Maker Thoroughly
Rinsing the coffee maker is a key step in cleaning your Keurig. It removes leftover vinegar or cleaning solution. This step ensures your coffee tastes fresh and pure. It also helps keep the machine working well. Proper rinsing prevents any strong flavors from mixing with your next brew.
Refill the Water Tank with Fresh Water After Descaling
Start by emptying the water reservoir. Fill it with fresh, cold water up to the max fill line. Using clean water is important to flush out any cleaning residue. Make sure the reservoir is properly seated in the machine. This step prepares the Keurig for the rinse cycles.
Running Multiple Rinse Cycles
Place a large mug on the drip tray. Run a brew cycle without inserting a K-cup. This pushes fresh water through the machine. Repeat this rinse cycle at least three times. Multiple cycles ensure all vinegar or cleaner is flushed out. Stop only when the water runs clear and tastes clean.
Step 4: Clean All Removable Keurig Parts for Better Performance
Cleaning the removable parts of your Keurig coffee maker keeps it working well. Regular cleaning prevents clogs and removes coffee oils. Take out these parts carefully for a thorough wash. Use warm water and mild soap to clean them.
Washing The K-cup Holder And Funnel
Remove the K-Cup holder by lifting it straight up. Detach the funnel from the holder. Wash both parts with warm, soapy water. Use a soft brush or cloth to scrub inside. Rinse thoroughly to remove soap residue. Let them dry completely before placing back. You can also place them on the top rack of your dishwasher.
Cleaning The Drip Tray And Cover
Slide the drip tray out from the machine’s base. Remove the drip tray cover carefully. Wash both parts in warm, soapy water. Use a sponge to clean any coffee stains or spills. Rinse well to avoid soap taste. Dry with a clean towel or air dry. Reinstall the tray and cover securely before use.
Step 5: Maintain the Exterior of Your Keurig Machine
Maintaining the exterior of your Keurig coffee maker keeps it looking fresh and working well. Dirt, coffee spills, and dust can build up on the surface. Regular cleaning prevents stains and damage. A clean machine adds to your kitchen’s neatness. Follow simple steps to care for the outside of your Keurig daily or weekly.
Wipe Down the Keurig Exterior Without Damaging the Finish
Use a soft, damp cloth to wipe the machine’s surface. Focus on areas with spills or stains. Stay away from rough scrubbers that might damage the surface. Gently clean the water reservoir, drip tray, and outer shell. Dry the surface with a clean towel to prevent water spots. Wiping regularly stops grime buildup and keeps the machine shiny.
Using All-purpose Cleaners Safely
Choose mild, all-purpose cleaners without harsh chemicals. Spray the cleaner on a cloth, never directly on the machine. Harsh chemicals can damage plastic and metal parts. Test the cleaner on a small spot first to check for damage. Use gentle circular motions to clean tough spots. Rinse the cloth and wipe again to remove residue. Safe cleaning extends the life of your Keurig’s exterior.
:max_bytes(150000):strip_icc()/how-to-clean-and-descale-keurig-mini-6834333-12-2c02fadca53945e5b7231ce9522af346.jpg)
Credit: www.thespruce.com
Step 6: Clear the Keurig Needles to Fix Slow Brewing Issues
Clearing the needles in your Keurig coffee maker helps keep it brewing smoothly. Coffee grounds and debris often clog these tiny parts. Regular cleaning prevents blockages and maintains water flow. Use simple tools and careful steps to clean the needles effectively. This section explains how to clear both the entrance and exit needles.
Using A Paperclip To Remove Coffee Grounds
Take a paperclip and straighten it carefully. Insert the paperclip into the needle holes. Gently push to loosen any stuck coffee grounds. Do not use too much force to avoid damage. Repeat this for both the entrance and exit needles. This method removes clogs that stop water from flowing.
Ensure Smooth Water Flow After Cleaning the Needles
After clearing grounds, run a water-only brew cycle. Place a large cup under the spout. Start a brew without a K-cup to flush out debris. Check if water flows smoothly through the needles. Repeat the flushing process if flow is slow. Proper water flow ensures better coffee taste and machine health.
Step 7: Replace the Keurig Water Filter for Better Tasting Coffee
Replacing the water filter in your Keurig coffee maker helps keep your coffee tasting fresh. It also protects your machine from mineral buildup. Clean water improves the flavor and extends the life of your brewer.
Water filters trap impurities like chlorine and sediment. Over time, the filter becomes less effective. Changing it regularly ensures your coffee stays pure and your machine runs smoothly.
How Often Should You Change the Keurig Water Filter?
Change the water filter every two months or after 60 tank refills. If your water is very hard, change it more often. A worn filter can cause weak coffee or slow brewing.
Check the filter indicator light on some Keurig models. It will remind you when the filter needs replacement. If your machine has no indicator, mark the date on your calendar.
Easy Steps to Replace a Keurig Water Filter at Home
First, remove the water reservoir from the machine. Take out the old water filter from the reservoir. Discard the used filter carefully.
Next, soak the new filter in fresh water for five minutes. This removes any loose carbon dust. After soaking, rinse the filter under running water for a few seconds.
Insert the new filter into the reservoir’s filter holder. Press it down firmly until it fits snugly. Reattach the water reservoir to the machine.
Run at least two full tanks of water through the machine to flush the new filter. This step clears any loose carbon and prepares the filter for brewing.
Step 8: Daily and Weekly Keurig Cleaning Tips for Long Life
Keeping your Keurig coffee maker clean ensures great-tasting coffee every time. Regular maintenance prevents buildup and extends your machine’s life. Follow these daily and weekly cleaning tips to keep your Keurig running smoothly.
Routine Wiping And Component Cleaning
Wipe down the outside of your machine every day using a damp cloth. This removes dust and coffee stains. Remove the K-cup holder and wash it weekly. Use warm, soapy water or place it in the dishwasher. Clear the entrance and exit needles with a straightened paperclip. This stops clogs from old coffee grounds. Take out the drip tray and rinse it weekly. Clean the tray and its cover with warm water. Replace the water filter every two months to keep water fresh.
How Often Should You Descale Your Keurig Coffee Maker?
Descale your Keurig every three to six months. Use white vinegar or a commercial descaling solution. Fill the water reservoir halfway with vinegar, then top it off with water. Run a brew cycle without a K-cup to let the solution clean inside. Repeat the cycle once more for a thorough clean.
Rinse the reservoir well and run several brewing cycles with fresh water. This removes any vinegar taste or residue. Mark your calendar to keep descaling on schedule. This prevents mineral buildup and keeps coffee flavor pure.
Keurig Maintenance Schedule (Quick Reference Chart)
Here’s a simple chart I use to keep mine in top shape:
| Maintenance Task | How Often | Why It Matters | Personal Tip |
|---|---|---|---|
| Empty and Refill Water Reservoir | Daily | Fresh water makes better coffee and prevents bacteria. | I always use filtered water for cleaner taste. |
| Wipe Exterior Surfaces | Daily | Keeps your Keurig looking neat and prevents grime. | A soft damp cloth works best—no harsh cleaners. |
| Clean Drip Tray and K-Cup Holder | Weekly | Stops buildup of coffee oils and residue. | I rinse mine after every few brews to stay ahead. |
| Clean Needles (Entrance & Exit) | Weekly | Prevents clogs that slow brewing and affect taste. | Use a paperclip to clear grounds gently. |
| Descale with Vinegar or Solution | Every 3 Months | Removes mineral buildup and keeps flow steady. | I mark my calendar after each cleaning cycle. |
| Replace Water Filter | Every 2 Months | Improves flavor and protects the machine. | If your water is hard, replace it monthly. |
| Deep Clean Removable Parts | Every 2–3 Weeks | Ensures all parts stay free of residue. | I soak mine in warm, soapy water overnight. |
Cleaning Differences by Keurig Model
All Keurig coffee makers need cleaning. But each model works a little differently. Over the years, I’ve used many—from the small K-Mini to the smart K-Supreme Plus. Here’s what I’ve learned from real use.
Not all models clean the same way. Some have a descale mode, while others use only water and vinegar. A few also include water filters that need care.
K-Mini and K-Express
These are simple models. They have no descale button or water filter. To clean, fill the tank with half vinegar and half water. Run several brew cycles with no coffee pod inserted. Then rinse by running fresh water. I like to do two or three rinse cycles since the tank is small.
K-Classic and K-Elite
These models use a charcoal water filter. Remove the filter before cleaning or descaling. Use the “Hot Water” or “Strong Brew” button to flush the system. Their large tanks make it easy to run several cleaning cycles at once.
K-Supreme and K-Supreme Plus
These have a built-in descale mode. Press and hold the 8 oz and 12 oz buttons to start it. The multi-stream needles need extra care. I clean them often to keep the coffee flowing well.
K-Duo and K-Duo Plus
These brew both cups and carafes. Clean both sides for best results. Run vinegar through the single-serve side first, then the carafe side. This keeps both brewing systems fresh and ready.
Always check your manual before cleaning. Some models show a descale light, and others don’t. Knowing your model saves time and keeps your Keurig working like new.
Common Keurig Cleaning Mistakes and How to Avoid Them
Even experienced Keurig users make small cleaning mistakes. These simple errors can dull flavor or reduce machine life. Let’s go over a few I often see and how to avoid them.
1. Using Too Much Vinegar: Many people think stronger vinegar cleans better. But it can harm your Keurig’s inner parts over time. I’ve tested this myself, and strong vinegar left a sharp smell for days. Always mix equal parts white vinegar and water. This mix removes buildup safely without hurting your brewer. It keeps cleaning gentle but effective.
2. Skipping the Rinse Cycle: After descaling, never skip rinsing with clean water. Vinegar or cleaner left inside changes the taste of your next brew. It can make coffee taste bitter or sour. I always run at least three rinse cycles until the water smells fresh again. This step keeps your coffee pure and your machine healthy.
3. Forgetting Regular Cleaning: Waiting until your Keurig slows down means it’s already dirty. Regular care stops buildup before it starts. I wipe my machine every few days and descale every three months. A quick routine keeps the brewer working like new and the coffee tasting great.
Final Thoughts: Keep Your Keurig Coffee Maker Clean for the Best Brew
Regular cleaning keeps your Keurig brewing fresh coffee every day. Use vinegar or descaling solution to remove buildup inside. Don’t forget to clean the K-cup holder, needles, and drip tray often. Wiping the outside keeps the machine looking neat. Rinse well to avoid any leftover taste.
Simple steps can extend your Keurig’s life and improve coffee flavor. Clean your machine regularly for the best cup every time.
FAQs: How to Clean Keurig Coffee Maker
What Is The Best Way To Clean A Keurig?
Clean a Keurig by descaling with a vinegar-water or commercial solution. Brew the mixture, rinse thoroughly with fresh water, and wash removable parts regularly. Wipe the exterior and clear needles to remove coffee grounds. Replace the water filter for optimal performance.
Should You Run Vinegar Through A Keurig To Clean It?
Yes, run a vinegar-water solution through your Keurig to descale and remove buildup. Rinse thoroughly with water afterward.
What Button To Press To Descale A Keurig?
How Do I Run A Clean Cycle On My Keurig?
Fill the reservoir halfway with white vinegar, then add water to the max line. Run a brew cycle without a K-cup. Repeat once, then rinse by brewing fresh water several times. Clean removable parts separately with warm, soapy water and wipe the exterior.
How Often Should I Clean My Keurig Coffee Maker?
Clean your Keurig every 3 months to keep it working well and tasting fresh.

Hi, I’m Joshua Miller, a U.S.-based food lover, review writer, and Co-founder of KitchenWink.com. I hold a Bachelor of Science in Food Science and Culinary Technology, and for over five years I’ve been testing kitchen gadgets like air fryers, blenders, and other cooking tools.
I’m also a home cook, so every product I review is tried in real kitchens—not just in theory. My reviews are based on real results, simple fixes, and tips that anyone can use. With both formal training and hands-on testing, I make sure my advice is clear, honest, and practical.
My goal is simple: to help home cooks choose the right tools and make cooking easier every day.


